A cool technique to create a pixel-art texture for your Godot terrain
In this post, I’m going to detail some techniques that I use to apply a dynamic pixel-art texture to a 3D terrain in Godot.
Note: this post is a direct translation of the original french version.
Some context
I always loved video game. And programming. However, I didn't try game programming until my 40th year.
(I'll conveniently leave out the time I got detention in high school for creating a prototype of a street-fighting game that let my philosophy and physics teachers beat each other up.)
I've been learning the open-source game engine Godot. And since I’m a sentimental person, I let myself be guided by nostalgia.
In my childhood, I was especially fond of “god-game” type titles. And right at the top of the list of my favorite games is Populous 3.
Populous: the beginning
Populous is a strategy game released in 1998. The gameplay is, all in all, fairly basic: through a series of levels, the goal is to grow your village before going off to thrash the rival tribes.
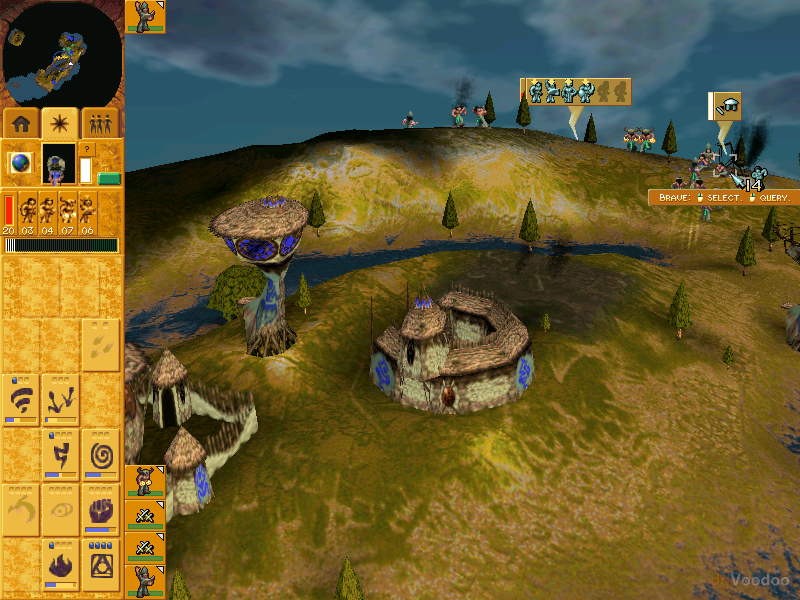
As the game progresses, you unlock new buildings that provide access to new units, and above all, new spells that can be cast by the Shaman. At first limited to small fireballs or swarms of flies, the Shaman eventually becomes a divine war machine, able to bury the enemy under showers of fireballs, send their village flying with tornadoes, or even swallow it whole with a volcano.
If I was so fascinated by this game, I think it was for two reasons.
First, the terraforming possibilities were incredible: during a match, you could completely reshape the terrain with spells, creating bridges, eroding the land, summoning volcanoes… For the time, such flexibility was absolutely mind-blowing.
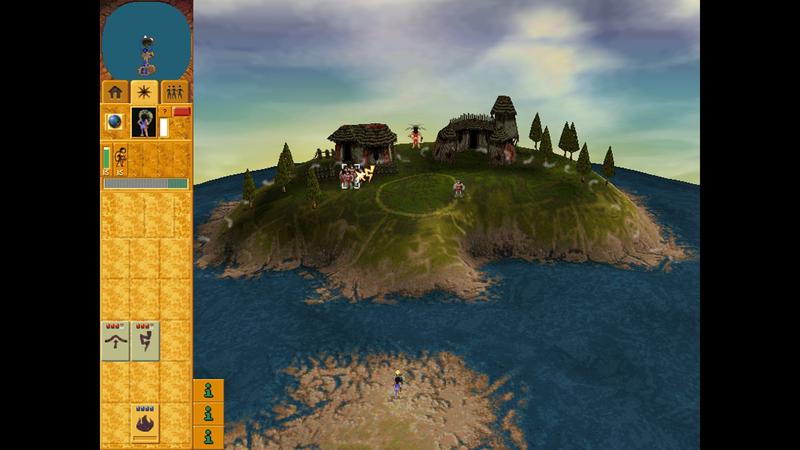
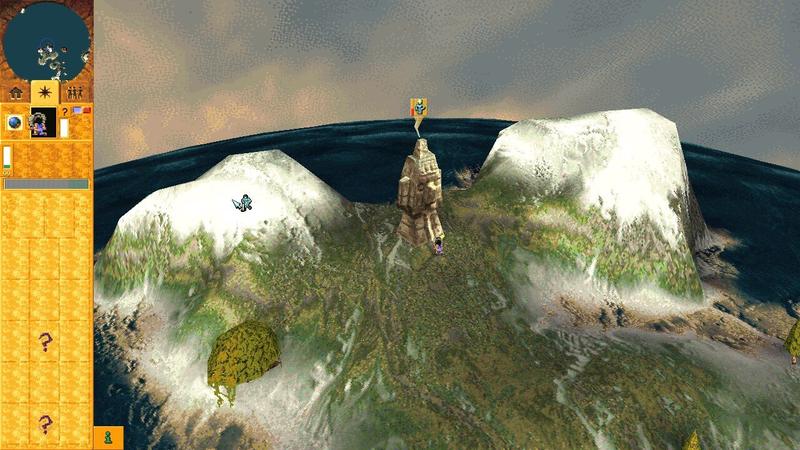
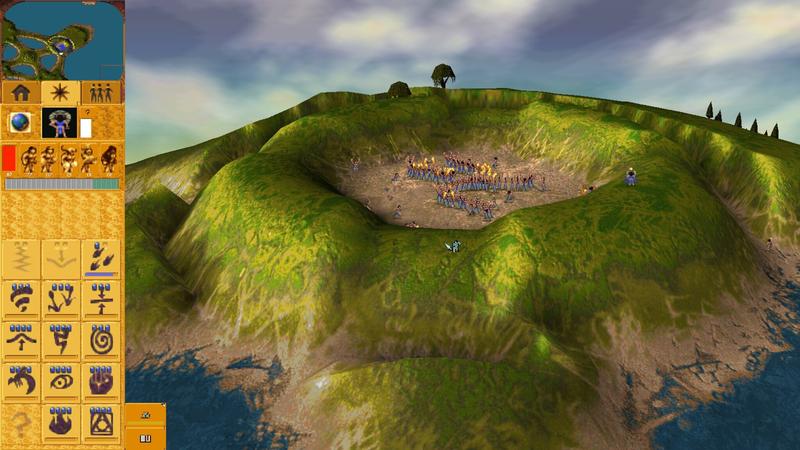
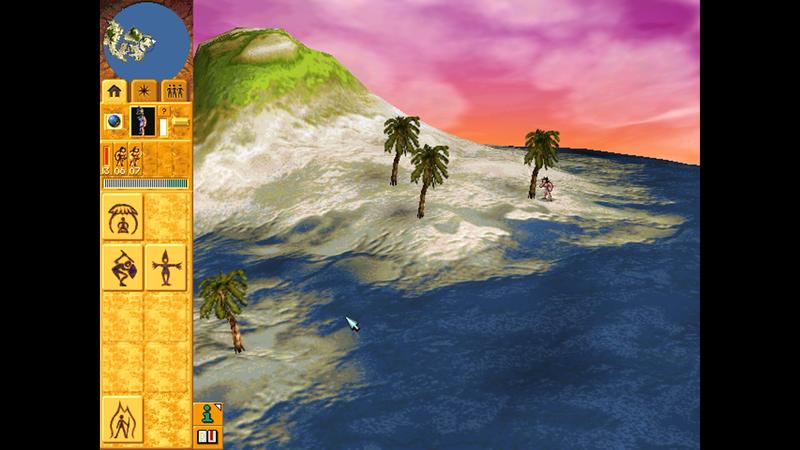
Above all, the graphics were amazing! Take a look at these screenshots — they’ll probably make you chuckle a bit — but notice how the terrain looks alive. And most importantly, keep in mind that the rendering was entirely dynamic: you could cast a bridge between two hills, watch the ground rise up between them, and see the texture transform — shifting from a lush lowland meadow to rocky soil and then to a snowy desert, all in real time.
Take just about any game that’s more than 15 years old and the graphics look ridiculous. But not Populous. Almost 30 years later, I still feel the same fascination when I play it again out of nostalgia.
So… my project
I digress, so let’s get technical.
I created a prototype with Godot that can display a 3D terrain with terraforming features. I quickly realized that it’s very difficult to achieve a satisfying look both from a wide overview and in extreme close-up.
I wanted to draw inspiration from the dynamic, lively rendering of Populous, but also from its somewhat retro, highly pixelated style.
So I set out to understand how the rendering in Populous was coded, and I re-implemented that technique with Godot — which is what I’m going to share here.
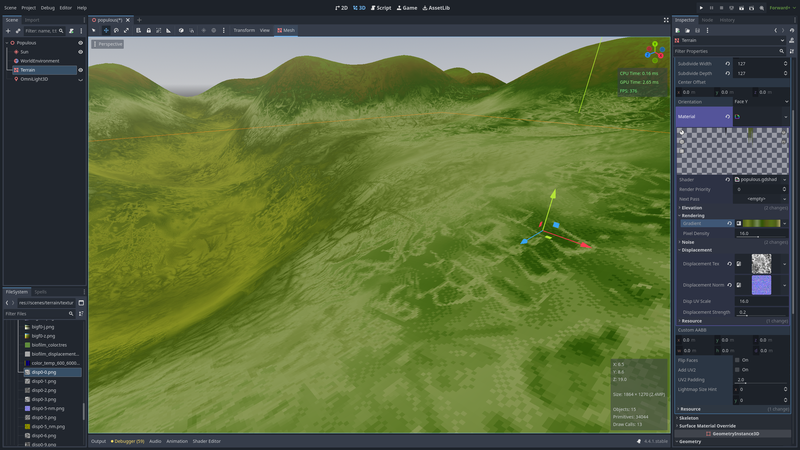
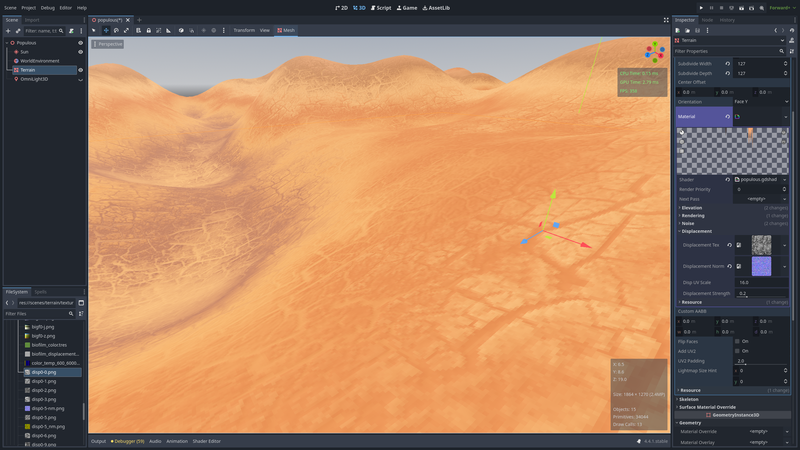
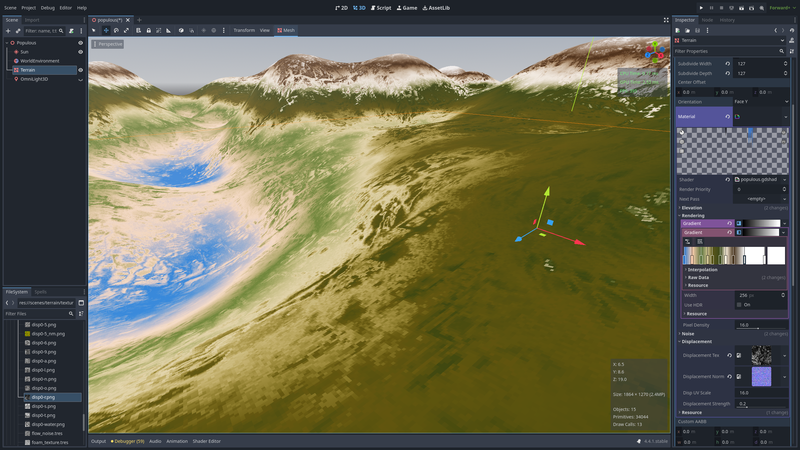
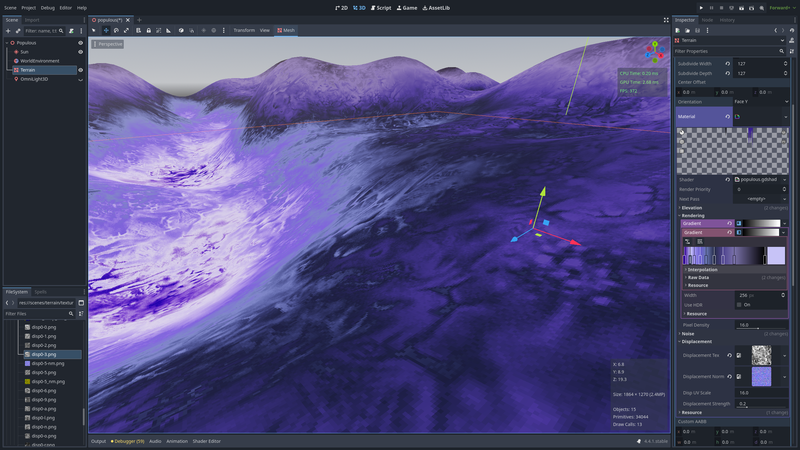
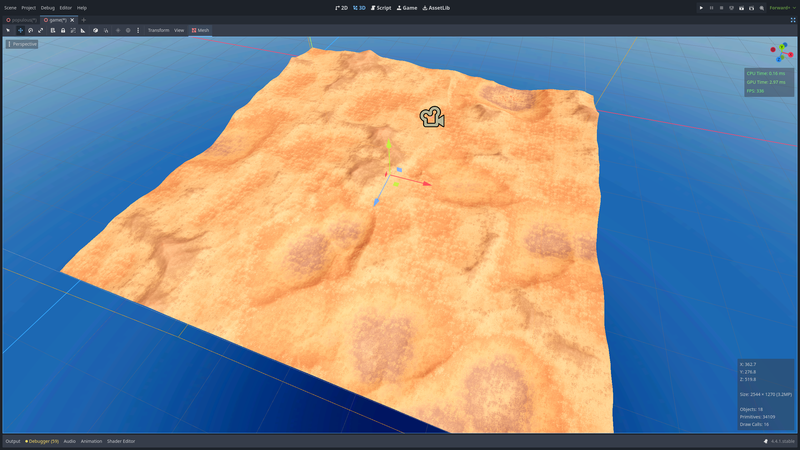
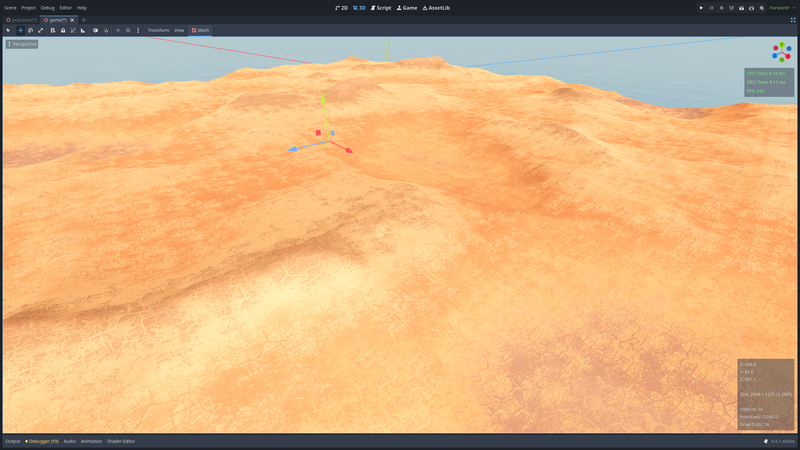
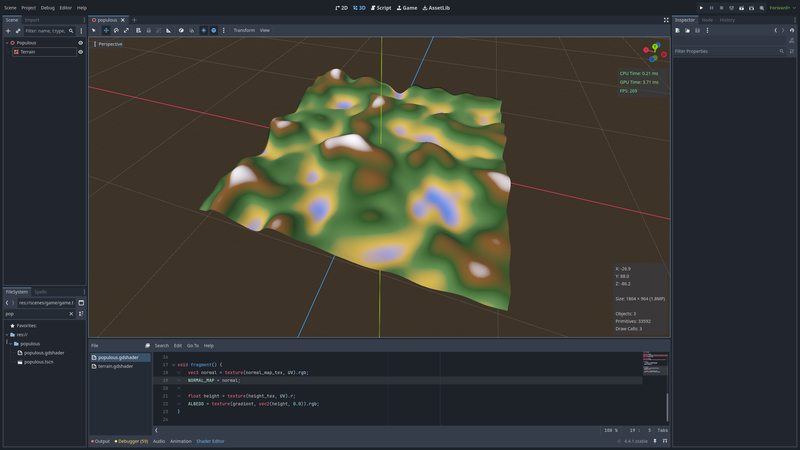
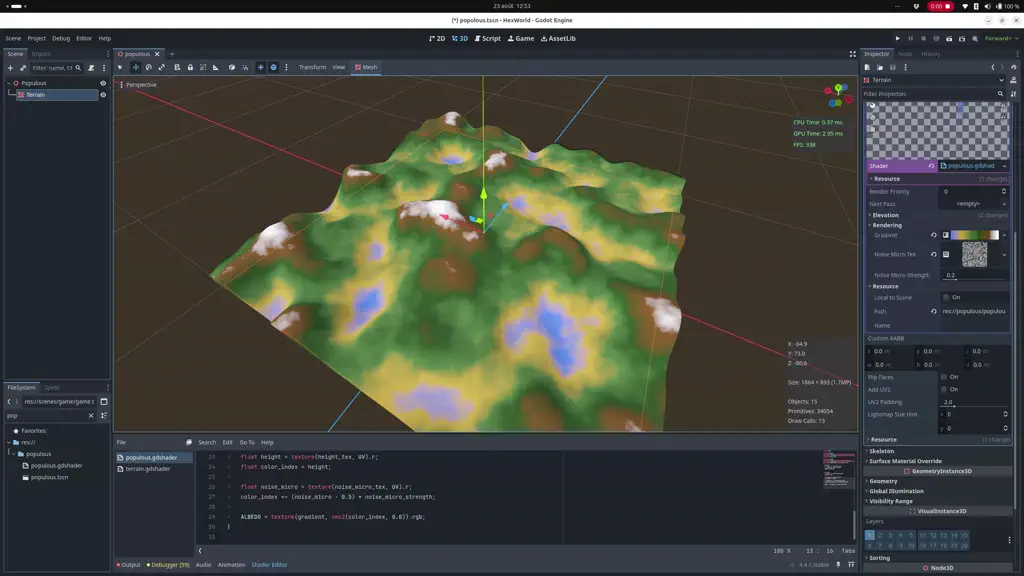
Here are a few screenshots of the current results.
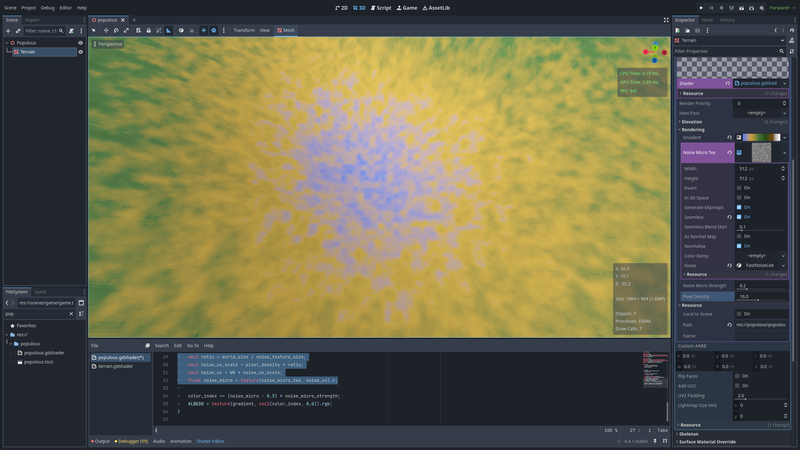
Godot scene setup
First step: let’s create the object that will represent the terrain.
Note: I won’t go too deep into the details here since this part basically amounts to following the existing documentation.
In the file tree, select “Create new -> Scene.” Then in the node tree, choose “Add child node -> MeshInstance3D” and rename it “Terrain.”
Next, select the newly created terrain, and in the Inspector, under the “Mesh” property, set it to “new PlaneMesh.”
In the Mesh properties, specify a size of 128x128 (for example) and a subdivision of 127x127.
If you configure the 3D editor to display a Wireframe view, you should end up with something like this. Cool non ?

Still in the MeshInstance3D properties, under “Material,” add a “ShaderMaterial,” then in “Shader” → “new Shader”, create a new one and give it a name. And voilà — a brand new shader!
Note: The purpose of this tutorial is not to explain how shaders work — there’s already plenty of resources on the subject. I’ll assume you already have at least a basic idea of what they’re about. If not, I’ll point you to Godot’s excellent documentation on shaders.
Let's climb up
We want a terrain whose texture changes dynamically with the topology. But our current terrain is completely flat. What a pitty! Let’s fix that.
In our shader, let’s add three parameters:
- a texture that will contain the height variations (ranging from zero to one);
- the same texture, which will allow us to specify the normals (and thus correctly calculate the terrain’s lighting);
- a multiplier to get the final height.
Here’s the code used:
shader_type spatial;

group_uniforms Elevation;
uniform sampler2D height_tex: hint_default_black, filter_linear, repeat_disable;
uniform sampler2D normal_map_tex: hint_default_black, filter_linear, repeat_disable;
uniform float height_max = 15.0;

void vertex() {
    float height = texture(height_tex, UV).r;
    float final_height = height * height_max;
    VERTEX.y = final_height;
}

void fragment() {
    vec3 normal = texture(normal_map_tex, UV).rgb;
    NORMAL_MAP = normal;
}
In the property inspector, the new options appear. Under “Height Tex,” add a “New NoiseTexture2D” and then, in “Noise” → “New FastNoiseLite.”
Next, copy the texture by dragging it into “Normal Map Tex,” then select “Make Unique (Recursive),” and finally set it “as Normal Map.”
As a bonus, you can slightly adjust the Sun’s angle to make the relief shading more noticeable. You should get something similar.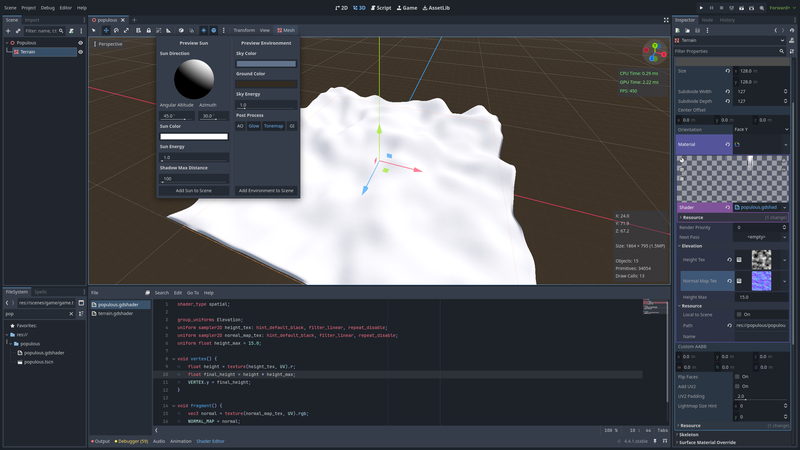
So far, we’ve only been following the tutorial. Let’s move on to the next step.
A nice color gradient
When you look closely at Populous screenshots, you’ll notice that, overall, the texture/color changes according to altitude.
Zero altitude is always blue, representing water; you often see sandy colors at low altitudes, followed by lush green meadows or rocky mountains as you go higher.
This is, in fact, a very classic terrain rendering technique found in many games. No problem — this will be our first step.
In our shader, let’s add a gradient parameter: a texture that will contain a color gradient.
shader_type spatial;

group_uniforms Elevation;
uniform sampler2D height_tex: hint_default_black, filter_linear, repeat_disable;
uniform sampler2D normal_map_tex: hint_default_black, filter_linear, repeat_disable;
uniform float height_max = 15.0;

group_uniforms Rendering;
uniform sampler2D gradient: source_color, filter_linear, repeat_disable;

void vertex() {
    float height = texture(height_tex, UV).r;
    float final_height = height * height_max;
    VERTEX.y = final_height;
}

void fragment() {
    vec3 normal = texture(normal_map_tex, UV).rgb;
    NORMAL_MAP = normal;

    float height = texture(height_tex, UV).r;
    ALBEDO = texture(gradient, vec2(height, 0.0)).rgb;
}
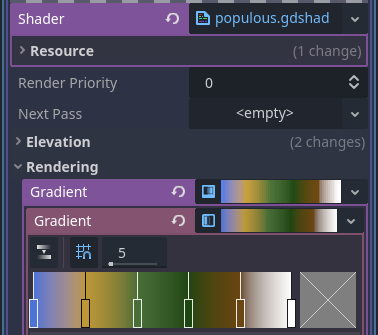
In the inspector, select the new property and add a “GradientTexture1D.” Godot will then conveniently create a 1-pixel-high texture that will contain a color gradient.
Very quickly, use Godot’s interface to set up a small selection of colors: blue for low altitudes, white for the highest points, and some yellow, green, and brown in between…
Let's get back to this code excerpt:
float height = texture(height_tex, UV).r;
ALBEDO = texture(gradient, vec2(height, 0.0)).rgb;
The height_tex texture contains the altitude of the current pixel, and this value is normalized — meaning it ranges between zero and one.
Texture coordinates (the famous UV parameter) are also between zero and one. Here, we naturally have a direct correspondence between altitude and position in the color gradient. Nice!
The result looks like this.
It’s already a bit less dreary than our plain gray mesh, but we’re still far from the final result.
Let's make some noise
Our terrain looks dull because it’s hopelessly smooth. Indeed, a specific altitude corresponds to an exact color. Thankfully, the real world is less monotonous. How can we make our rendering a bit more exciting?
As in 95% of cases in game development, the answer is “add some noise.”
When sampling the color gradient, we’re going to add a bit of noise, which will produce a result a bit more chaotic — but also much more enticing.
Let’s add some new parameters to the shader.
uniform sampler2D noise_micro_tex: filter_linear, repeat_enable;
uniform float noise_micro_strength: hint_range(0.0, 1.0) = 0.2;
We tell Godot that this texture should be repeated, which allows us to “tile” it multiple times across our terrain.
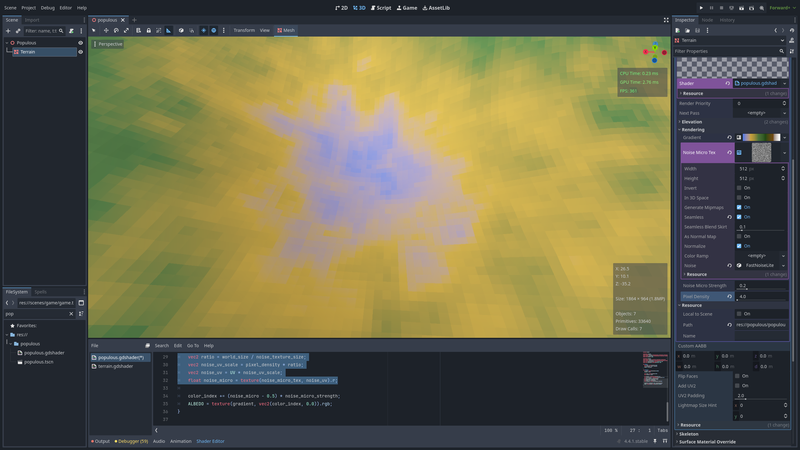
In the inspector, set up a new texture of type “NoiseTexture2D”, don’t forget to check “Seamless,” then create a new “FastNoiseLite.” Select a noise type of “Value noise,” which is close to white noise.
Finally, we’ll modify our shader as follows:
// The base color depends on the altitude
float height = texture(height_tex, UV).r;
float color_index = height;

// Get the noise value for the current pixel
// The idea is to sample a value slightly before or after in the color gradient.
float noise_micro = texture(noise_micro_tex, UV).r;

// The noise has a value between zero and one.
// We want to sample the color a little upward or downward,
// so we center the value by subtracting 0.5.
noise_micro -= 0.5;

// Finally, we apply the sampling factor.
color_index += noise_micro * noise_micro_strength;

ALBEDO = texture(gradient, vec2(color_index, 0.0)).rgb;
The result is already a bit less boring!

You can tweak the parameters of the noise_micro_tex texture or the noise_micro_strength value to adjust the look to your liking.
A bit of pixel art?
As it stands, the result isn’t too bad. But remember, we’re aiming for a slightly retro style. And for that, we want a nice big pixelated look (very trendy right now).
The noise texture we’re using has a finite size (512px here), but when it’s “tiled” across the terrain, the GPU automatically uses linear interpolation, which produce a continuous value. That’s why the result still looks smooth.

To pixelate our result, we’ll tell the GPU to stop that unwanted interpolation and to sample only the nearest pixel value.
This requires just a minimal change.
Before:
uniform sampler2D noise_micro_tex: filter_linear, repeat_enable;
After :
uniform sampler2D noise_micro_tex: filter_nearest, repeat_enable;
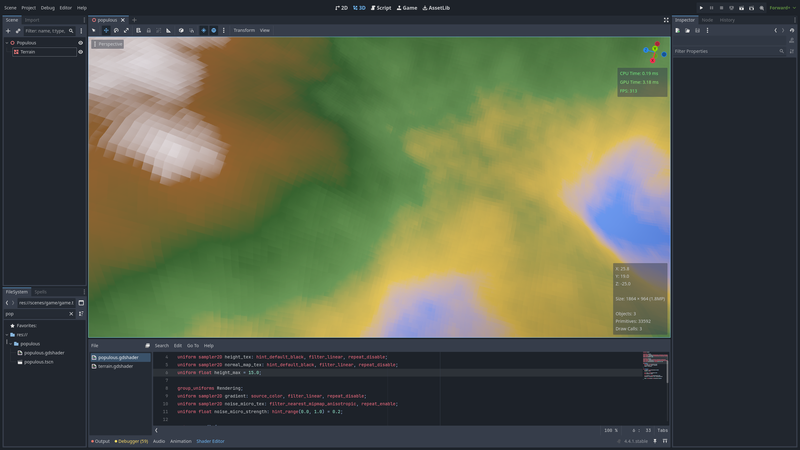
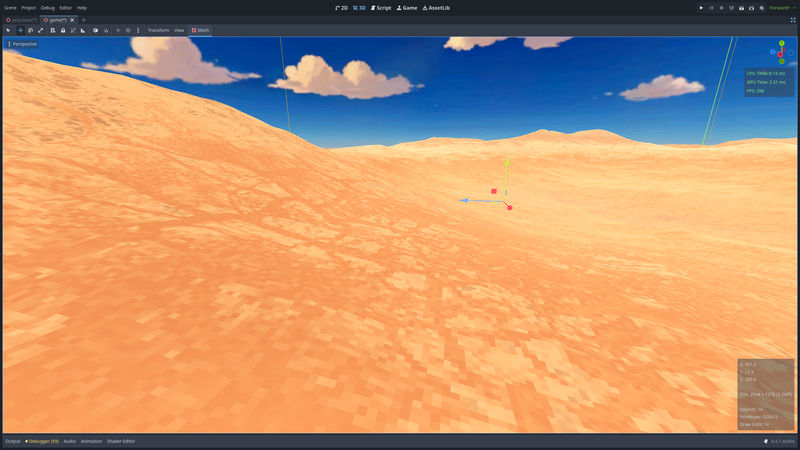
Notice now that the pixel grid becomes visible — our terrain is no longer smooth. There we go, we can officially call our prototype “retro.”
Let’s add a new refinement: I want to be able to control the pixel density, meaning I want my terrain to be rendered with X pixels per square meter (for example).
Let’s introduce a new parameter.
uniform float pixel_density: hint_range(4.0, 32.0) = 16.0;
Let’s ponder for a bit.
Our terrain texture is 128px wide. We created a 128m widthe mesh, so 1px = 1m².
The noise texture has a width of 512px (Godot’s default), four times the size of the terrain texture.
We apply both textures to the same surface. So, one pixel of the terrain texture “covers” 16 pixels of the noise texture.
This gives a pixel density of 16.
What if we want a different value? The most obvious solution would be to change the size of the noise texture, but that wouldn’t be very efficient.
The other solution is simply to repeat the texture, since it’s tileable. To do this, we just multiply the UV coordinates by the correct value.
vec2 world_size = vec2(textureSize(height_tex, 0));
vec2 noise_texture_size = vec2(textureSize(noise_micro_tex, 0));
vec2 ratio = world_size / noise_texture_size;
vec2 noise_uv_scale = pixel_density * ratio;
vec2 noise_uv = UV * noise_uv_scale;
float noise_micro = texture(noise_micro_tex, noise_uv).r;
With a 4x4 density:
With a 16x16 density:
Using displacement textures
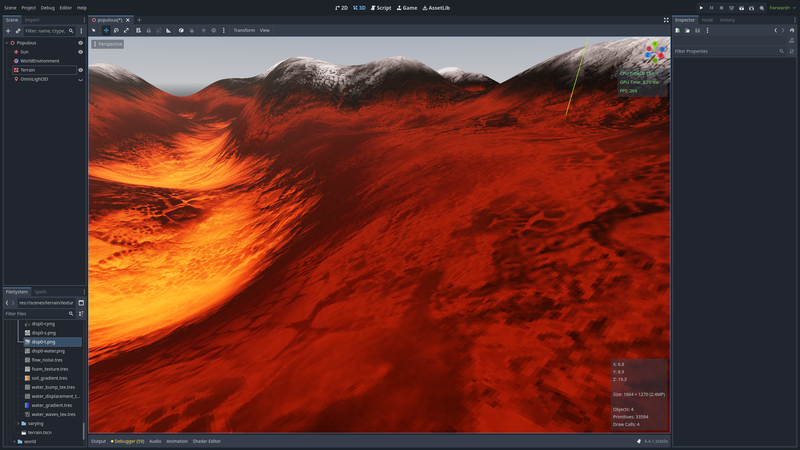
Let’s go back to the Populous example. You can see that the terrain is textured beyond simple random noise. You can recognize the undulations of a meadow, the waves of a sand dune, or the cracks of parched earth.
By inspecting the raw game data, one can extract textures called “displacement maps”. These are tileable black-and-white textures. One can then combine these textures with the technique described earlier to achieve a result that closely matches the original look.
Here are a few files directly extracted from the game’s data directory.
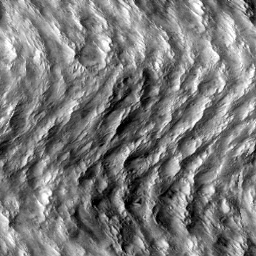
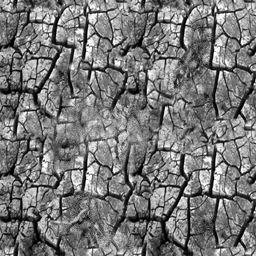
For this tutorial, I reused these textures as-is, but any black-and-white texture will work.
Let’s add some new parameters to the shader.
group_uniforms Displacement;
uniform sampler2D displacement_tex: filter_nearest, repeat_enable;
uniform float disp_uv_scale = 16.0;
uniform float displacement_strength: hint_range(0.0, 1.0) = 0.2;
Then in the fragment shader:
vec2 disp_uv = UV * disp_uv_scale;
float displacement = texture(displacement_tex, disp_uv).r;
color_index += (displacement - 0.5) * displacement_strength;
I recommend adjusting the blending coefficients for the noise texture and the displacement texture. I use 0.1 for the former and 0.2 for the latter.
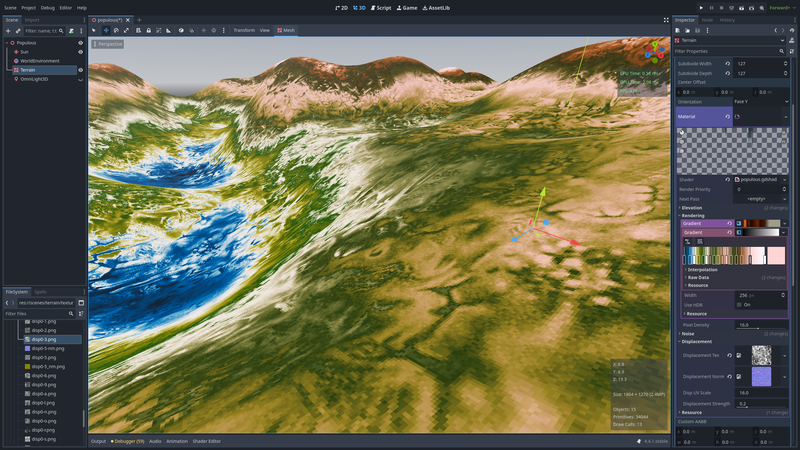
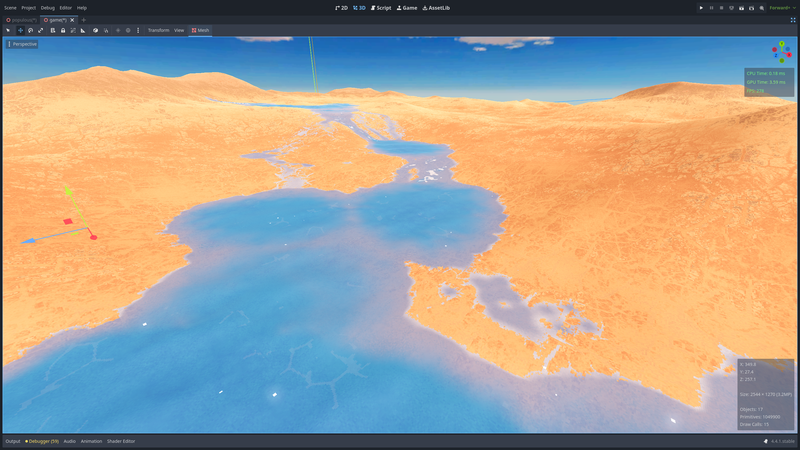
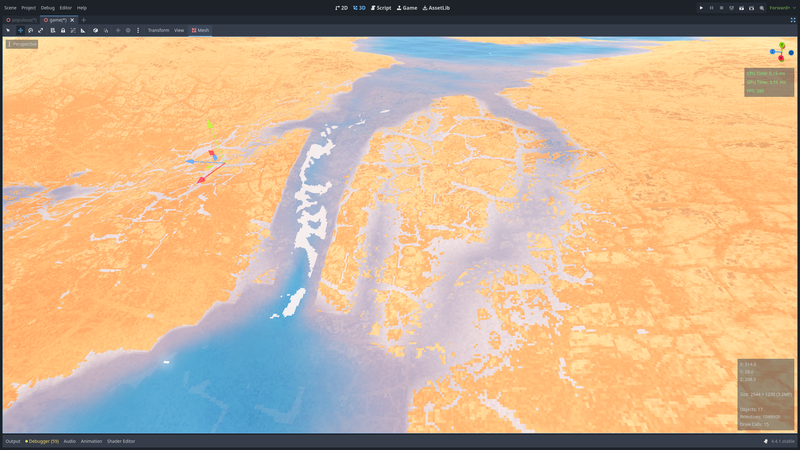
The result is fascinating. By changing the displacement texture, we maintain the color gradient according to altitude while giving it a recognizable pattern.

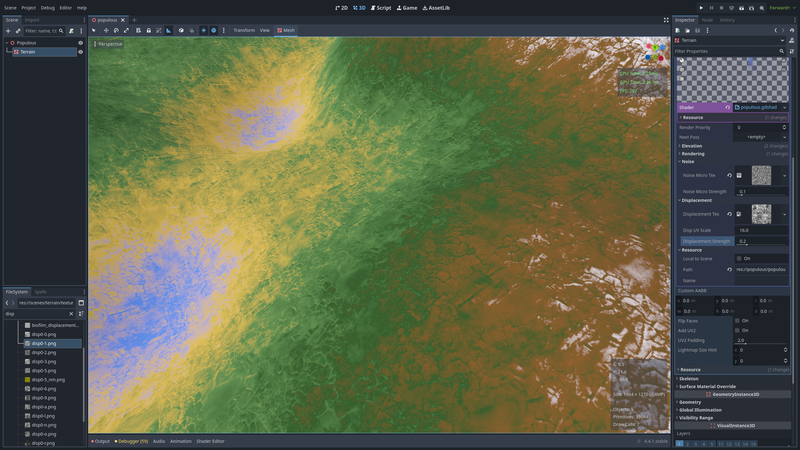


Tranquille Émile !
Be careful: once integrated, this texture will also introduce pixelation. It’s probably a good idea to maintain consistency between the texture sizes and the UV multiplier coefficients to preserve a correct result.
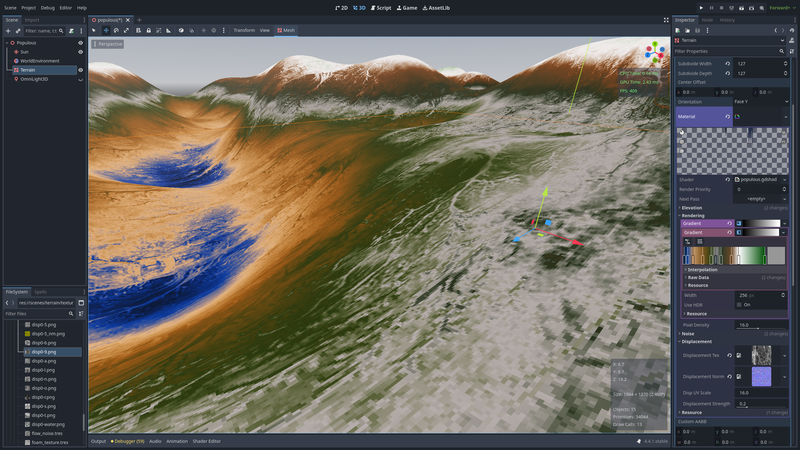
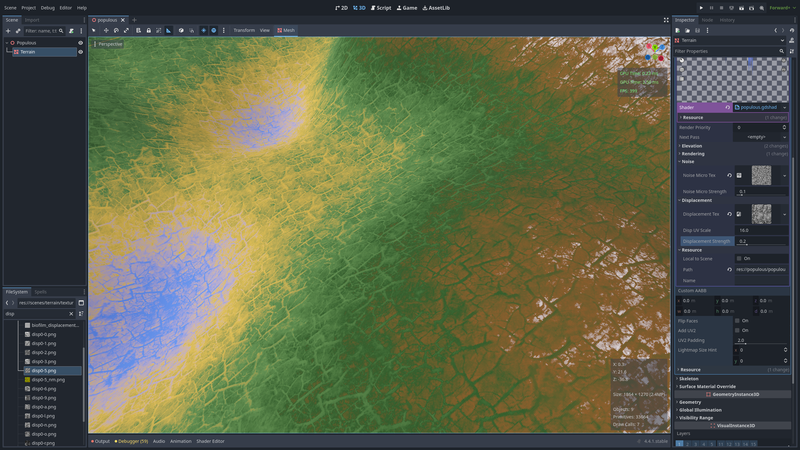
A bit more subtle
The result is starting to get interesting, but at this stage, the repetitive nature of the texture is far too noticeable. We’re going to add a new texture (yet again) to help mitigate that.
uniform sampler2D noise_macro_tex: filter_nearest, repeat_enable;
float noise_macro = texture(noise_macro_tex, noise_uv).r;
displacement *= noise_macro;
Before:
After
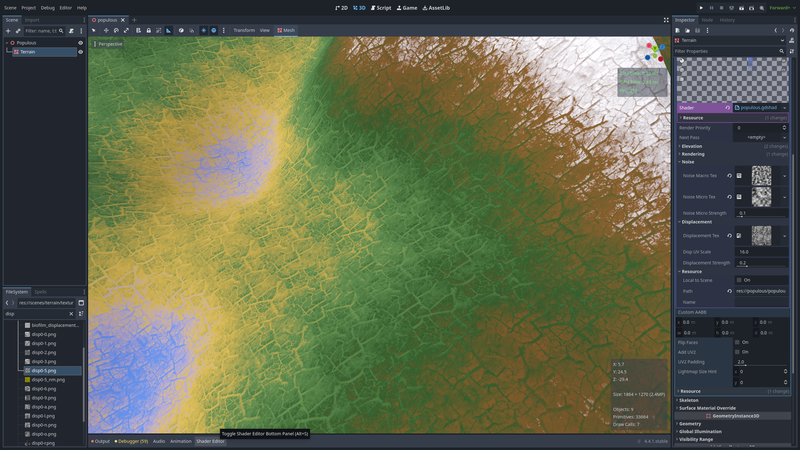
From afar
This is starting to look really nice!
However, there’s still a problem when viewing the terrain from a distance. The rendering looks extremely grainy and “dirty.” To fix this, we’ll ask Godot to 1) use texture mipmaps and 2) apply anisotropic filtering.
Before:
uniform sampler2D noise_macro_tex: filter_nearest, repeat_enable;
uniform sampler2D noise_micro_tex: filter_nearest, repeat_enable;
uniform sampler2D displacement_tex: filter_nearest, repeat_enable;
Après:
uniform sampler2D noise_macro_tex: filter_nearest_mipmap_anisotropic, repeat_enable;
uniform sampler2D noise_micro_tex: filter_nearest_mipmap_anisotropic, repeat_enable;
uniform sampler2D displacement_tex: filter_nearest_mipmap_anisotropic, repeat_enable;
Unfortunately, the result isn’t probably visible in the screenshots; you might need to zoom in a bit.
Before:

After:

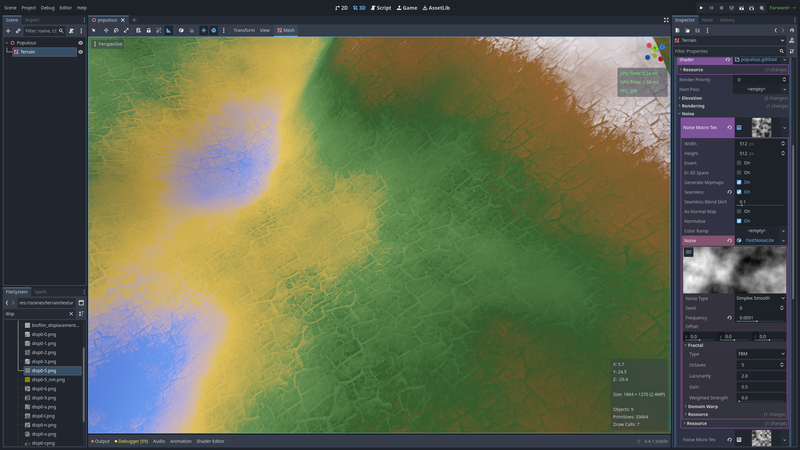
Adding some normals
*Populous was a game constrained by the technology of its time, and the lightning wasn't dynamic.
In fact, the game engine basically just darkened or brightened the texture based on various parameters: slope angle, direction relative to the Sun, etc. (It was done very tastefuly, I must say).
Since we don't live in the middle age anymore, we’ll use slightly more modern tools. To further enhance the texture of our terrain, we’re going to modify the normal vector.
To generate a normal map from a displacement map, you can use GIMP: Filters → Generic → Normal Map. And voilà — you have a normal map.
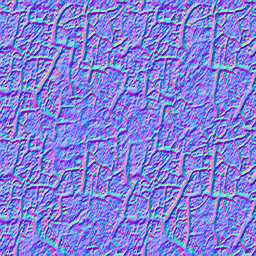
In the shader:
uniform sampler2D displacement_normal_tex: hint_normal, repeat_enable;
vec3 normal = texture(normal_map_tex, UV).rgb;
vec3 displacement_normal = texture(displacement_normal_tex, disp_uv).rgb;
normal += displacement_normal * 0.15;
NORMAL_MAP = normalize(normal);
This change will make the texture stand out more by reacting better to light.
Without the normal:
With the normal vector:

Conclusion
There would still be plenty of improvements that could be made, but we can stop here for now.
None of the techniques described here are ground breaking. But one can produce a nice looking terrain in just a few minutes. Perfect for prototyping, or for stylized terrains.
Here is the full shader source:
shader_type spatial;

group_uniforms Elevation;
uniform sampler2D height_tex: hint_default_black, filter_linear, repeat_disable;
uniform sampler2D normal_map_tex: hint_default_black, filter_linear, repeat_disable;
uniform float height_max = 15.0;

group_uniforms Rendering;
uniform sampler2D gradient: source_color, filter_linear, repeat_disable;
uniform float pixel_density: hint_range(4.0, 32.0) = 16.0;

group_uniforms Noise;
uniform sampler2D noise_macro_tex: filter_nearest_mipmap_anisotropic, repeat_enable;
uniform sampler2D noise_micro_tex: filter_nearest_mipmap_anisotropic, repeat_enable;
uniform float noise_micro_strength: hint_range(0.0, 1.0) = 0.1;

group_uniforms Displacement;
uniform sampler2D displacement_tex: filter_nearest_mipmap_anisotropic, repeat_enable;
uniform sampler2D displacement_normal_tex: hint_normal, repeat_enable;
uniform float disp_uv_scale = 16.0;
uniform float displacement_strength: hint_range(0.0, 1.0) = 0.2;

void vertex() {
    float height = texture(height_tex, UV).r;
    float final_height = height * height_max;
    VERTEX.y = final_height;
}

void fragment() {
    // Find base color position
    float height = texture(height_tex, UV).r;
    float color_index = height;

    // Disturb color with basic noise
    vec2 world_size = vec2(textureSize(height_tex, 0));
    vec2 noise_texture_size = vec2(textureSize(noise_micro_tex, 0));
    vec2 ratio = world_size / noise_texture_size;
    vec2 noise_uv_scale = pixel_density * ratio;
    vec2 noise_uv = UV * noise_uv_scale;
    float noise_micro = texture(noise_micro_tex, noise_uv).r;
    color_index += (noise_micro - 0.5) * noise_micro_strength;

    // Add some texture with displacement map
    vec2 disp_texture_size = vec2(textureSize(displacement_tex, 0));
    vec2 disp_uv = UV * disp_uv_scale;
    float displacement = texture(displacement_tex, disp_uv).r;

    // Merge some noise to make the tiles less visible
    float noise_macro = texture(noise_macro_tex, noise_uv).r;
    displacement *= noise_macro;

    color_index += (displacement - 0.5) * displacement_strength;
    ALBEDO = texture(gradient, vec2(color_index, 0.0)).rgb;

    // Compute normal map
    vec3 normal = texture(normal_map_tex, UV).rgb;
    vec3 displacement_normal = texture(displacement_normal_tex, disp_uv).rgb;
    normal += displacement_normal * 0.15;
    NORMAL_MAP = normalize(normal);
}
By modifying the displacement texture and the gradient, you can very quickly achieve really nice results. I find it amazing to get such an outcome using techniques that are almost 30 years old. Here are a few examples to finish.